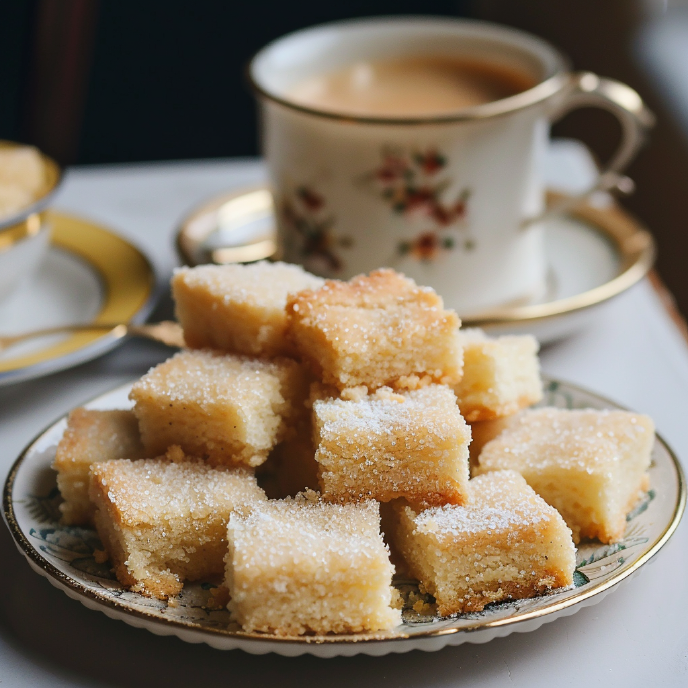
Have you ever eaten buttery, crumbly, melt-in-your-mouth Irish shortbread?
No? Then get ready to fall in love!
Irish shortbread is a cornerstone of traditional Irish baking. And it’s as rich and stunning as the landscape of Ireland itself.
Renowned for its simplicity, this shortbread recipe calls for just a handful of pantry staples. That means you need to get top-quality ingredients. And it all hinges on the butter.

Why Choose Kerrygold Butter for Shortbread?
The secret to shortbread is butter. It’s what makes it rich and tender, and it literally holds it all together.
Kerrygold® Irish Creamery Butter is, quite simply, the best of the best.
It elevates a simple shortbread to a memorable delight.
Seriously, using high-quality Irish butter like Kerrygold in your shortbread cannot be overstated.
Of course, any top brand will do the trick. But we’re making Irish shortbread, right? So there’s no substitute!
What You’ll Need for Perfect Shortbread
Creating the perfect Irish shortbread begins with the right ingredients.
And while the butter is the most important, each component plays a pivotal role in the final texture, taste, and appearance.
So, here’s what you’ll need to craft this buttery, crumbly treat:
- Kerrygold® Irish Creamery Butter: This premium Irish butter provides the shortbread with its signature rich flavor and melt-in-your-mouth texture.
- Caster Sugar: Also known as “superfine” sugar, it has finer grains, so it dissolves more easily. Remember that you’ll also need a little extra for sprinkling on top.
- Plain Flour (All-Purpose Flour): Plain flour is the foundation of shortbread and provides structure to the biscuit.
- Cornflour (Cornstarch): Other than the butter, this is the secret to the shortbread’s tender crumb. Cornflour softens the dough’s protein content, resulting in a delightful texture.

Step-by-Step Guide to Making Irish Shortbread
Just like shortbread doesn’t need many ingredients, it also doesn’t need a lot of prep work.
But if you’ve never made shortbread before, follow this detailed step-by-step guide to ensure it’s utterly irresistible:
- Preheat the oven and prep the baking tin. To make removing the shortbread easy, lightly spray the pan with oil so the parchment sticks. Then be sure to leave some parchment overhanging, so you can grab it.
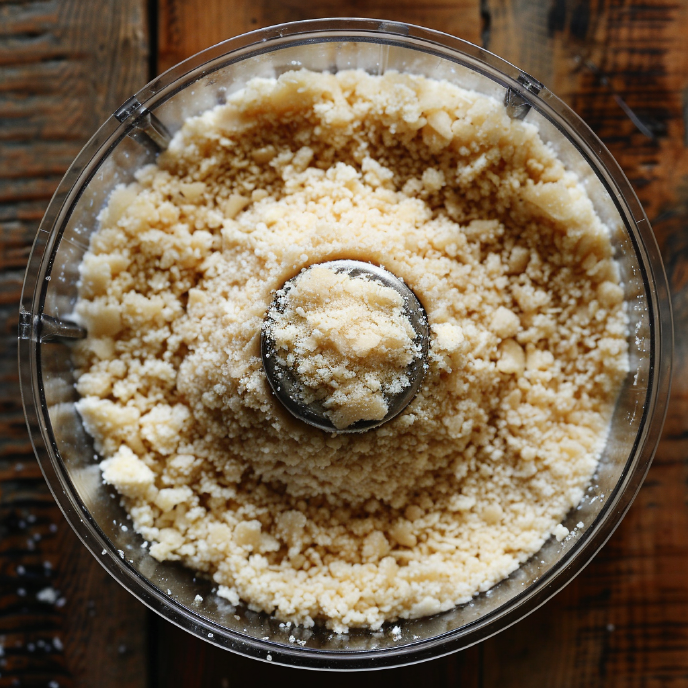
- Cube and blend the butter. Break it up with a few pulses on its own. Then add the sugar and blend until it’s nice and smooth. If you don’t have a food processor, either rub the butter into the sugar with your hands or beat it with a paddle attachment in a stand mixer.
- Sift and combine the dry ingredients. Sifting ensures the flours are well blended and evenly distributed. When you add them to the butter mix, it’s vital not to overmix. The goal is to bring the dough together without it becoming overly smooth. That’s why you’ll only pulse it. If using a stand mixer, mix on low until it looks like coarse breadcrumbs.
- Press the dough into the tin. The dough should be in crumbs, not a lump of smooth dough. Just pour it into the baking tin and press it together firmly. Try to make it nice and flat.
- Prick it with a fork and create pre-cut portions. Making small pricks keeps the shortbread from puffing up. As for the portioning, it’s optional. But it helps to cut clean slices after baking. I use a bench scraper because you want to press into the dough, not cut it. But a sharp knife works, too.
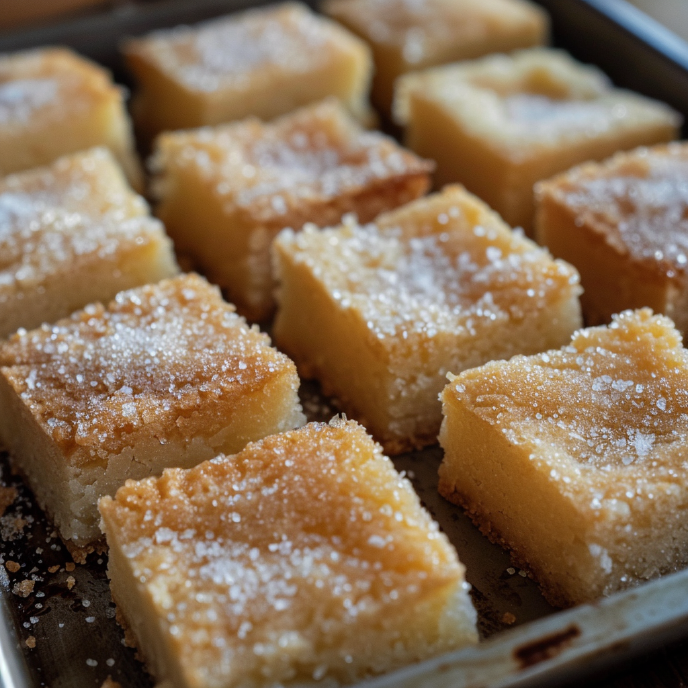
- Bake to buttery perfection. Shortbread should be pretty pale when it comes out of the oven. In fact, it might not look baked. But as long as the edges are golden and the middle looks set, it will finish cooking out of the oven.
- Add the finishing touch. The added sugar isn’t needed. And if you want to glaze or frost it, you should leave it off. But it’s the traditional way to finish shortbread and adds a delightful crunch to the top layer.
- Cool and serve. The shortbread will finish baking in the tin, so be sure to let it cool in the tin for at least 5-10 minutes. That also gives it time to set so that when you lift it, it won’t break. If it looks like it’s cracking, leave it to cool for longer. Then, when it’s cold, cut it into portions and enjoy.

Tips and Tricks
To ensure your Irish shortbread is authentically tender and satisfying, read these expert tips before you start:
- Don’t Overmix: This is key! If you blend the butter and sugar with the flour into a smooth dough, it will be more like sugar cookies, which is fine, but it’s not shortbread. It should be crumbly when it goes into the baking pan.
- Why Cornflour?: Cornflour plays a pivotal role in softening the dough. In the U.S., it’s cornstarch - not cornmeal. If you don’t have any, use 340 grams (2 3/4 cups) of plain or all-purpose flour.
- Piercing the Dough: Not only will fork marks make the shortbread look nice, but they will also keep it nice and flat. It stops the shortbread from lifting/puffing, which can lead to uneven baking.
- Cool Gradually: The shortbread needs to set before you can lift it. And it needs to set before you can cut it. If you cut it too soon, the texture might change. Why? It’s like cutting warm bread. The heat will bring moisture, drying out the edges when cooled.
Storing Irish Shortbread
It’s not hard to make, but that doesn’t mean you don’t need to know how to serve and store leftovers properly!
After all, you want everyone to enjoy it as long as possible!
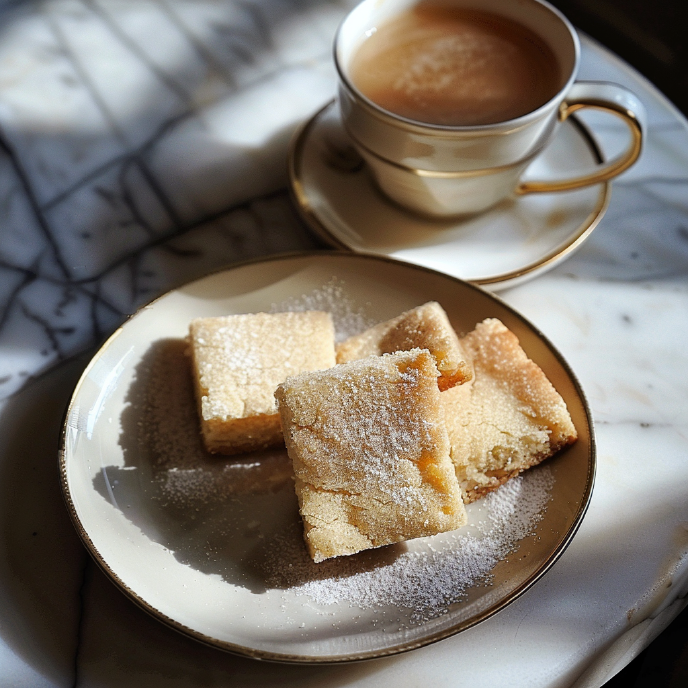
I think it’s best as a treat with afternoon tea. But then, it’s great any time of day!
As for storing:
Place cold shortbread in an airtight container at room temperature for up to two weeks. Don’t store it in the fridge, as that will likely dry it out. For longer storage, double-wrap it in plastic and place it in a freezer bag. Store in the freezer for up to three months. Thaw at room temperature until soft.

Frequently Asked Questions about Irish Shortbread
Q: Can I use regular butter instead of Kerrygold®?
A: Kerrygold® Irish Creamery Butter is preferred for its rich flavor and creamy texture. But if you can’t find any, look for a top-quality brand with high fat content for the best results. Land O Lakes European-style butter is a great choice.
Q: Is there a substitute for caster sugar?
A: If caster sugar is unavailable, pulse granulated sugar in a food processor until it’s finely ground, but not powdery.
Q: Can I make shortbread without a food processor?
A: Absolutely! Cream the butter and sugar with an electric hand mixer, with a paddle in a stand mixer, or rub it between your fingers. To incorporate the flour, use a spatula or wooden spoon to avoid overmixing.
Q: How do I know when the shortbread is done baking?
A: The shortbread is done when the edges turn lightly golden, and the center is set. That means the middle should not look wet, and it should feel firm when (very gently) pressed.
Q: Can I add mix-ins to my shortbread?
A: Yes! Plain shortbread is super tasty. But feel free to add lemon zest, vanilla extract, lavender, spices, or even finely ground tea leaves for a subtle flavor twist.
Kerrygold Irish Shortbread Recipe
Ingredients:
- 225g Kerrygold® Irish Creamery Butter (8 oz)
- 100g Caster Sugar, extra for the top (1/2 cup)
- 225g Plain Flour, extra for dusting (1 cup All-Purpose Flour)
- 125g Cornflour (1 cup Cornstarch)
Method:
- Preheat the oven to 190ºC (375ºF). Grease a 20x20 cm (8x8 in) baking tin with cooking spray and add a layer of parchment paper.
- Cut the butter into cubes, then add them to a food processor with the sugar. Pulse a few times, then blend until pale and smooth. Stop and scrape the sides, as needed.
- In a medium bowl, sift the flour and cornflour. Add the mix to the food processor and pulse to combine. Do not blend - it should not be a smooth dough.
- Pour the mixture into the prepared baking pan and press it flat with floured hands. Pierce the top with a fork all over the surface, then use a bench scraper to cut into portions (optional). If you don’t have a bench scraper, cut carefully with a sharp knife.
- Bake for 20-25 minutes or until the edges are lightly golden and the center looks set.
- Take the pan out of the oven and immediately sprinkle the top with a generous amount of sugar. Let it cool in the pan for 5-10 minutes, then lift it out using the parchment paper, and cool fully on a wire rack. Cut into portions and enjoy!
